Production Process of LED Beads
- LED chip inspection
Microscopic inspection: Whether there are mechanical damage and pitting on the surface of the material (whether the lockhill chip size and electrode size meet the process requirements and whether the electrode pattern is complete
- LED expansion
Since the LED chips are still arranged tightly and with a small pitch (about 0.1mm) after dicing, it is not conducive to the operation of the subsequent process. We use a film expander to expand the film of the bonding chip, and the distance between the LED chips is stretched to about 0.6mm. Manual expansion can also be used, but it is easy to cause bad problems such as chip drop and waste.
- LED dispensing
Put silver glue or insulating glue on the corresponding position of the LED bracket. (For GaAs, SiC conductive substrates, red, yellow, and yellow-green chips with back electrodes, silver glue is used. For blue and green LED chips with sapphire insulating substrate, insulating glue is used to fix the chip.) The difficulty of the process lies in the control of the dispensing volume. There are detailed process requirements for the height of the colloid and the dispensing position. Because silver glue and insulating glue have strict requirements on storage and use, the waking, mixing, and use time of silver glue must be paid attention to in the process.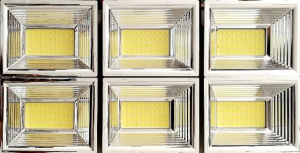
- LED glue preparation
Contrary to glue dispensing, glue preparation is to use a glue preparation machine to apply silver glue on the back electrode of the LED, and then install the LED with silver glue on the back of the LED bracket. The efficiency of glue preparation is much higher than that of glue dispensing, but not all products are suitable for glue preparation process.
- LED manual puncture piece
Place the expanded LED chips (with or without glue) on the fixture of the piercing table, place the LED bracket under the fixture, and use a needle to pierce the LED chips to the corresponding positions under the microscope. Compared with automatic rack mounting, manual piercing piece has an advantage, it is convenient to change different chips at any time, and it is suitable for products that need to install multiple chips.
- LED automatic mounting rack
Automatic mounting is actually a combination of the two major steps of glue (dispensing) and chip mounting. First, apply silver glue (insulating glue) on the LED bracket, and then use a vacuum nozzle to suck up the LED chip in the moving position, and then place it on The corresponding bracket position. In the process of automatic mounting, it is mainly necessary to be familiar with the equipment operation programming, and at the same time adjust the equipment’s glue and installation accuracy. In the selection of nozzles, try to choose bakelite nozzles to prevent damage to the surface of the LED chip, especially bakelite must be used for blue and green chips. Because the steel nozzle will scratch the current diffusion layer on the surface of the chip.
- LED sintering
The purpose of sintering is to solidify the silver paste, and sintering requires temperature monitoring to prevent poor batch performance. The sintering temperature of silver paste is generally controlled at 150°C, and the sintering time is 2 hours. According to the actual situation, it can be adjusted to 170°C for 1 hour. Insulating glue is generally 150°C for 1 hour. The silver glue sintering oven must be opened every 2 hours (or 1 hour) to replace the sintered product according to the process requirements, and it must not be opened at will. The sintering oven must not be used for other purposes to prevent pollution.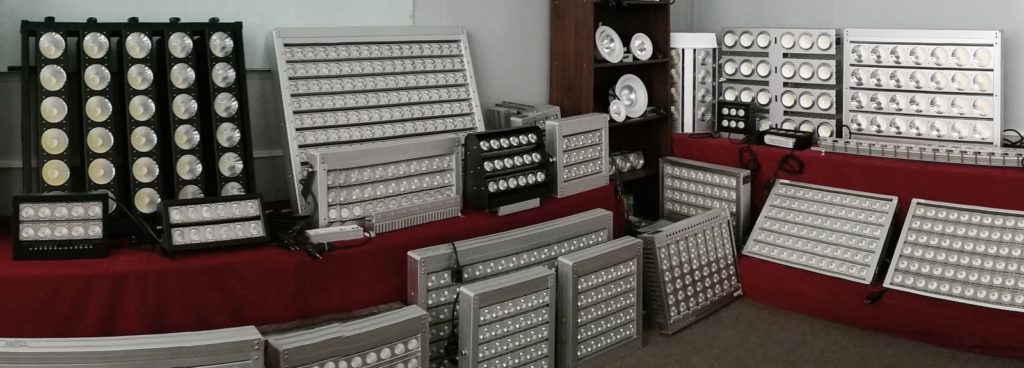
- LED pressure welding
The purpose of pressure welding is to lead the electrode to the LED chip to complete the connection of the inner and outer leads of the product. The pressure welding process of LED has two types: gold wire ball bonding and aluminum wire bonding. The picture on the right is the process of aluminum wire bonding. First, press the first point on the electrode of the LED chip, then pull the aluminum wire to the top of the corresponding bracket, press the second point and then tear the aluminum wire. The gold wire ball bonding process burns a ball before pressing the first point, and the rest of the process is similar. Pressure welding is a key link in LED packaging technology. The main things that need to be monitored in the process are the shape of the pressure-welded gold wire (aluminum wire), the shape of the solder joint, and the tension.
- LED sealant
There are mainly three types of LED packaging: glue, potting, and molding. Basically, the difficulties of process control are bubbles, lack of material, and black spots. The design is mainly the selection of materials, and the selection of a good combination of epoxy and brackets. (General LED cannot pass the air tightness test)
9.1 LED dispensing: TOP-LED and Side-LED are suitable for dispensing packages. Manual dispensing package requires high level of operation (especially white LED), the main difficulty is the control of the dispensing volume, because the epoxy will thicken during use. Dispensing for white light LEDs also has the problem of phosphor precipitation causing color difference in light output.
9.2 LED potting package: The package of Lamp-LED adopts potting form. The potting process is to first inject liquid epoxy into the LED molding cavity, then insert the pressure-welded LED bracket, put it in the oven to cure the epoxy, and then take the LED out of the cavity to form it.
9.3 LED molded package Put the pressure-welded LED bracket into the mold, clamp the upper and lower molds with a hydraulic press and vacuum, put the solid epoxy into the entrance of the glue injection channel, and press the hydraulic ejector into the mold glue channel for heating. The glue lane enters each LED molding groove and cures.
- LED curing and post curing
Curing refers to the curing of the encapsulated epoxy, and the general epoxy curing conditions are at 135°C for 1 hour. Molded packages are generally at 150°C for 4 minutes. The post-curing is to fully cure the epoxy while thermally aging the LED. Post-curing is very important to improve the bonding strength between epoxy and PCB. The general condition is 120°C, 4 hours.
- LED cutting and dicing
Since the LEDs are connected together (not individually) in production, Lamp packaged LEDs use cutting ribs to cut the connecting ribs of the LED bracket. SMD-LED is on a PCB board and requires a dicing machine to complete the separation work.
- LED test
Test the photoelectric parameters of the LED, inspect the external dimensions, and sort the LED products according to customer requirements.
- LED packaging The finished products are counted and packaged. Super bright LED needs anti-static packaging.
Quality Control of High Wattage LED Floodlight
First of all, you need to check whether the relevant certification of the lamp is complete. Secondly, quickly determine the quality of the LED lamp, because the LED lamp is mainly composed of a light source, a power supply and a radiator, the quality of the material and the technology used directly affect the quality and price of the lamp. The inspection starts from the data point of view, quickly evaluates the raw materials and craftsmanship of the LED lamp, and judges the quality of the LED lamp.
Comprehensive photoelectric function test of LED lamps
The photoelectric function test is an important basis for evaluating and reflecting the quality of LED lamps, and finding out whether there is a false standard phenomenon in the lamps. The inspection content includes: (1) Total luminous flux, (2) Luminous power, (3) Light intensity distribution, (4) Correlated color temperature (CCT), (5) Color rendering index (CRI), (6) Chromaticity coordinates or chromaticity coordinates, (7) Input communication or (DC) voltage, (8) Input communication or (DC) current, (9) Input power DC or (AC), (10) Input voltage frequency, (11) Power factor.
Quality evaluation of the core light source of LED lamps
Testing content of LED light source lamp beads:
(1). Comments on lens technology, types of packaging glue, presence or absence of pollutants, bubbles, and air tightness.
(2). Phosphor powder coating Phosphor layer coating process reviews, phosphor particle size, particle size dispersion, composition, presence or absence of gathering and sedimentation.
(3). Chip and chip process reviews, chip graphics microstructure measurement, defect search, chip contamination determination, whether there is leakage, whether there is damage.
(4). Comments on wire bonding bonding process, first and second welding trace observation, arc height measurement, diameter measurement, lead composition judgment.
(5). Comments on the bonding process of the bonding process, whether the bonding layer is vacant, whether it is delamination, the composition of the bonding layer, and the thickness of the bonding layer.
(6). Comments on bracket coating process, bracket composition, coating composition, coating thickness, bracket air tightness.
LED lamp heat dissipation function
As a new energy-saving lamp, LED only converts 30-40% of electrical energy into light during the lighting process, and all the others are converted into heat. In addition, the lifespan and quality of LED lamps are closely related to temperature. The lamp bead temperature, housing temperature, and heat dissipation temperature will affect the uniformity and quality of LED lighting. The heat dissipation judgment of LED lamps includes: (1) LED lamp heat dissipation plan and delineation, (2) After the lamp reaches thermal equilibrium, whether the temperature of each component is too high, (3) LED heat dissipation material detection, whether high specific heat is selected, Heat dissipation materials with high thermal conductivity.
Does the LED lamp contain substances harmful to the light source?
LED light source is afraid of sulfur, and more than 50% of its failure is caused by sulfur bromine chlorination of the silver-plated layer of lamp beads. After the LED light source shows the reaction of sulfur bromine chlorination, the product function area will be blackened, the luminous flux will gradually decrease, and the color temperature will show obvious drift. During the use process, it is very easy to show electricity leakage. The more serious situation is that the silver layer is completely corroded. The layer is exposed and the golden ball appears to fall off, thus showing a dead light. There are more than fifty kinds of raw materials in LED lamps, and these materials may also contain sulfur, chlorine and bromine. In a closed, high temperature environment, these sulfur, chlorine and bromine elements may volatilize into gases and corrode the LED light source. Testing the sulfur emission judgment statement of LED lamps is a key judgment statement to ensure the stable quality of LED lamps.
LED power quality judgment
The function of the LED drive power supply is to convert AC mains power into DC power suitable for LEDs. When selecting and planning LED driving power supplies, consideration should be given to factors such as reliability, power, power factor, driving methods, surge maintenance, and temperature negative feedback maintenance functions; LED driving power supplies for outdoor lamps should consider waterproof and moisture-proof functions, and require their housing to be It is light fast and not easy to age to ensure that the life of the driving power supply can be matched with the life of the LED. The content of the test: (1) Power output parameters: voltage, current, (2) Whether the driving power supply can ensure the characteristics of constant current output, whether it is a pure constant current driving method or a constant current and constant voltage driving method, (3) Whether it has separate over-current maintenance, short-circuit maintenance and open-circuit maintenance, (4) Judgment of power leakage: When the power is on, the shell should be free of charge. (5) Ripple voltage detection: No ripple voltage is the best. When there is ripple voltage, the smaller the peak value, the better. (6) Comments on stroboscopic: no stroboscopic after the LED street light is on, (7) Power-on output voltage/current: When power-on, the power output should not show large voltage/current. (8) Whether the power surge complies with relevant standards, such as IEC61000-4-5.
View the appearance structure of the lamp
The user’s instructions usually explain the materials used for the appearance of the lamp, and these instructions should be carefully checked. 1. Appearance check: The paint color is uniform, no pores, cracks, and impurities. The coating must be tightly adhered to the basic materials. The appearance of the LED lamp housing should be bright and flat, and there should be no scratches. , Cracks, deformation and other defects, 2. Dimension check: the shape dimension should meet the requirements of the drawing, 3. Data viewing: The application data and structural planning of each component of the lamp should meet the requirements of the drawing. 4. Installation check: all fastening screws on the exterior of the lamp should be tightened, the edges should be free of burrs and sharp edges, and the connections should be firm and not loose.

