How to arrange the lighting correctly in painter’s studio
Setting up the lights for your art studio is one of the most frustrating aspects of being an artist. I haven’t made my studio lighting to a satisfactory level until recently. Before that, it was either too dim, bright, and cool, or too warm or dazzling.
Reaching this point is not easy. Hope this article can save you the trouble of setting up art studio lighting. I don’t want to delve into the technical aspects because I want to make it as simple and feasible as possible.
Why is it so important to set up Art Studio lighting correctly
The light projected on the paint is the most important factor that determines the color you see in the paint. This will affect your decision as to which color to choose.
So, of course, it is important that you work hard to properly set the lights in the art studio so that you can paint below. Otherwise, over time, you may find that all the paintings seem to be too cool, too warm, too bright or too dark, because you are trying to compensate for the lack of light.
When I set up the studio lighting for the first time, I mistakenly thought I needed to squeeze as much light into the studio as possible. So I opened all the windows, installed powerful overhead lights, and even bought some extra lights.
But what I didn’t realize at the time was that more lights are not necessarily better. I can’t just fill my studio with lights and call it perfect, on the contrary, I just need to make sure I have good enough light. When I write well, I mean painting under the right light. This may vary from person to person.
The tricky part about studio lighting is that it is difficult to determine if your lighting settings are bad under this lighting. Our eyes are very good at adapting to the surrounding environment, so lamps that look like ordinary lighting may actually be very cool, warm, bright or dim lighting.
First, do a quick review of your current lighting
The first step in setting up Art Studio’s lighting equipment is to conduct a quick review of the existing lighting equipment. You should do this before you rush to buy an expensive home lighting system. Sometimes, all you need to do is make some adjustments to your existing equipment instead of outsourcing all new equipment.
After reviewing, please consider whether you need to adjust any of these light sources or add more light sources based on the information in the rest of this article.
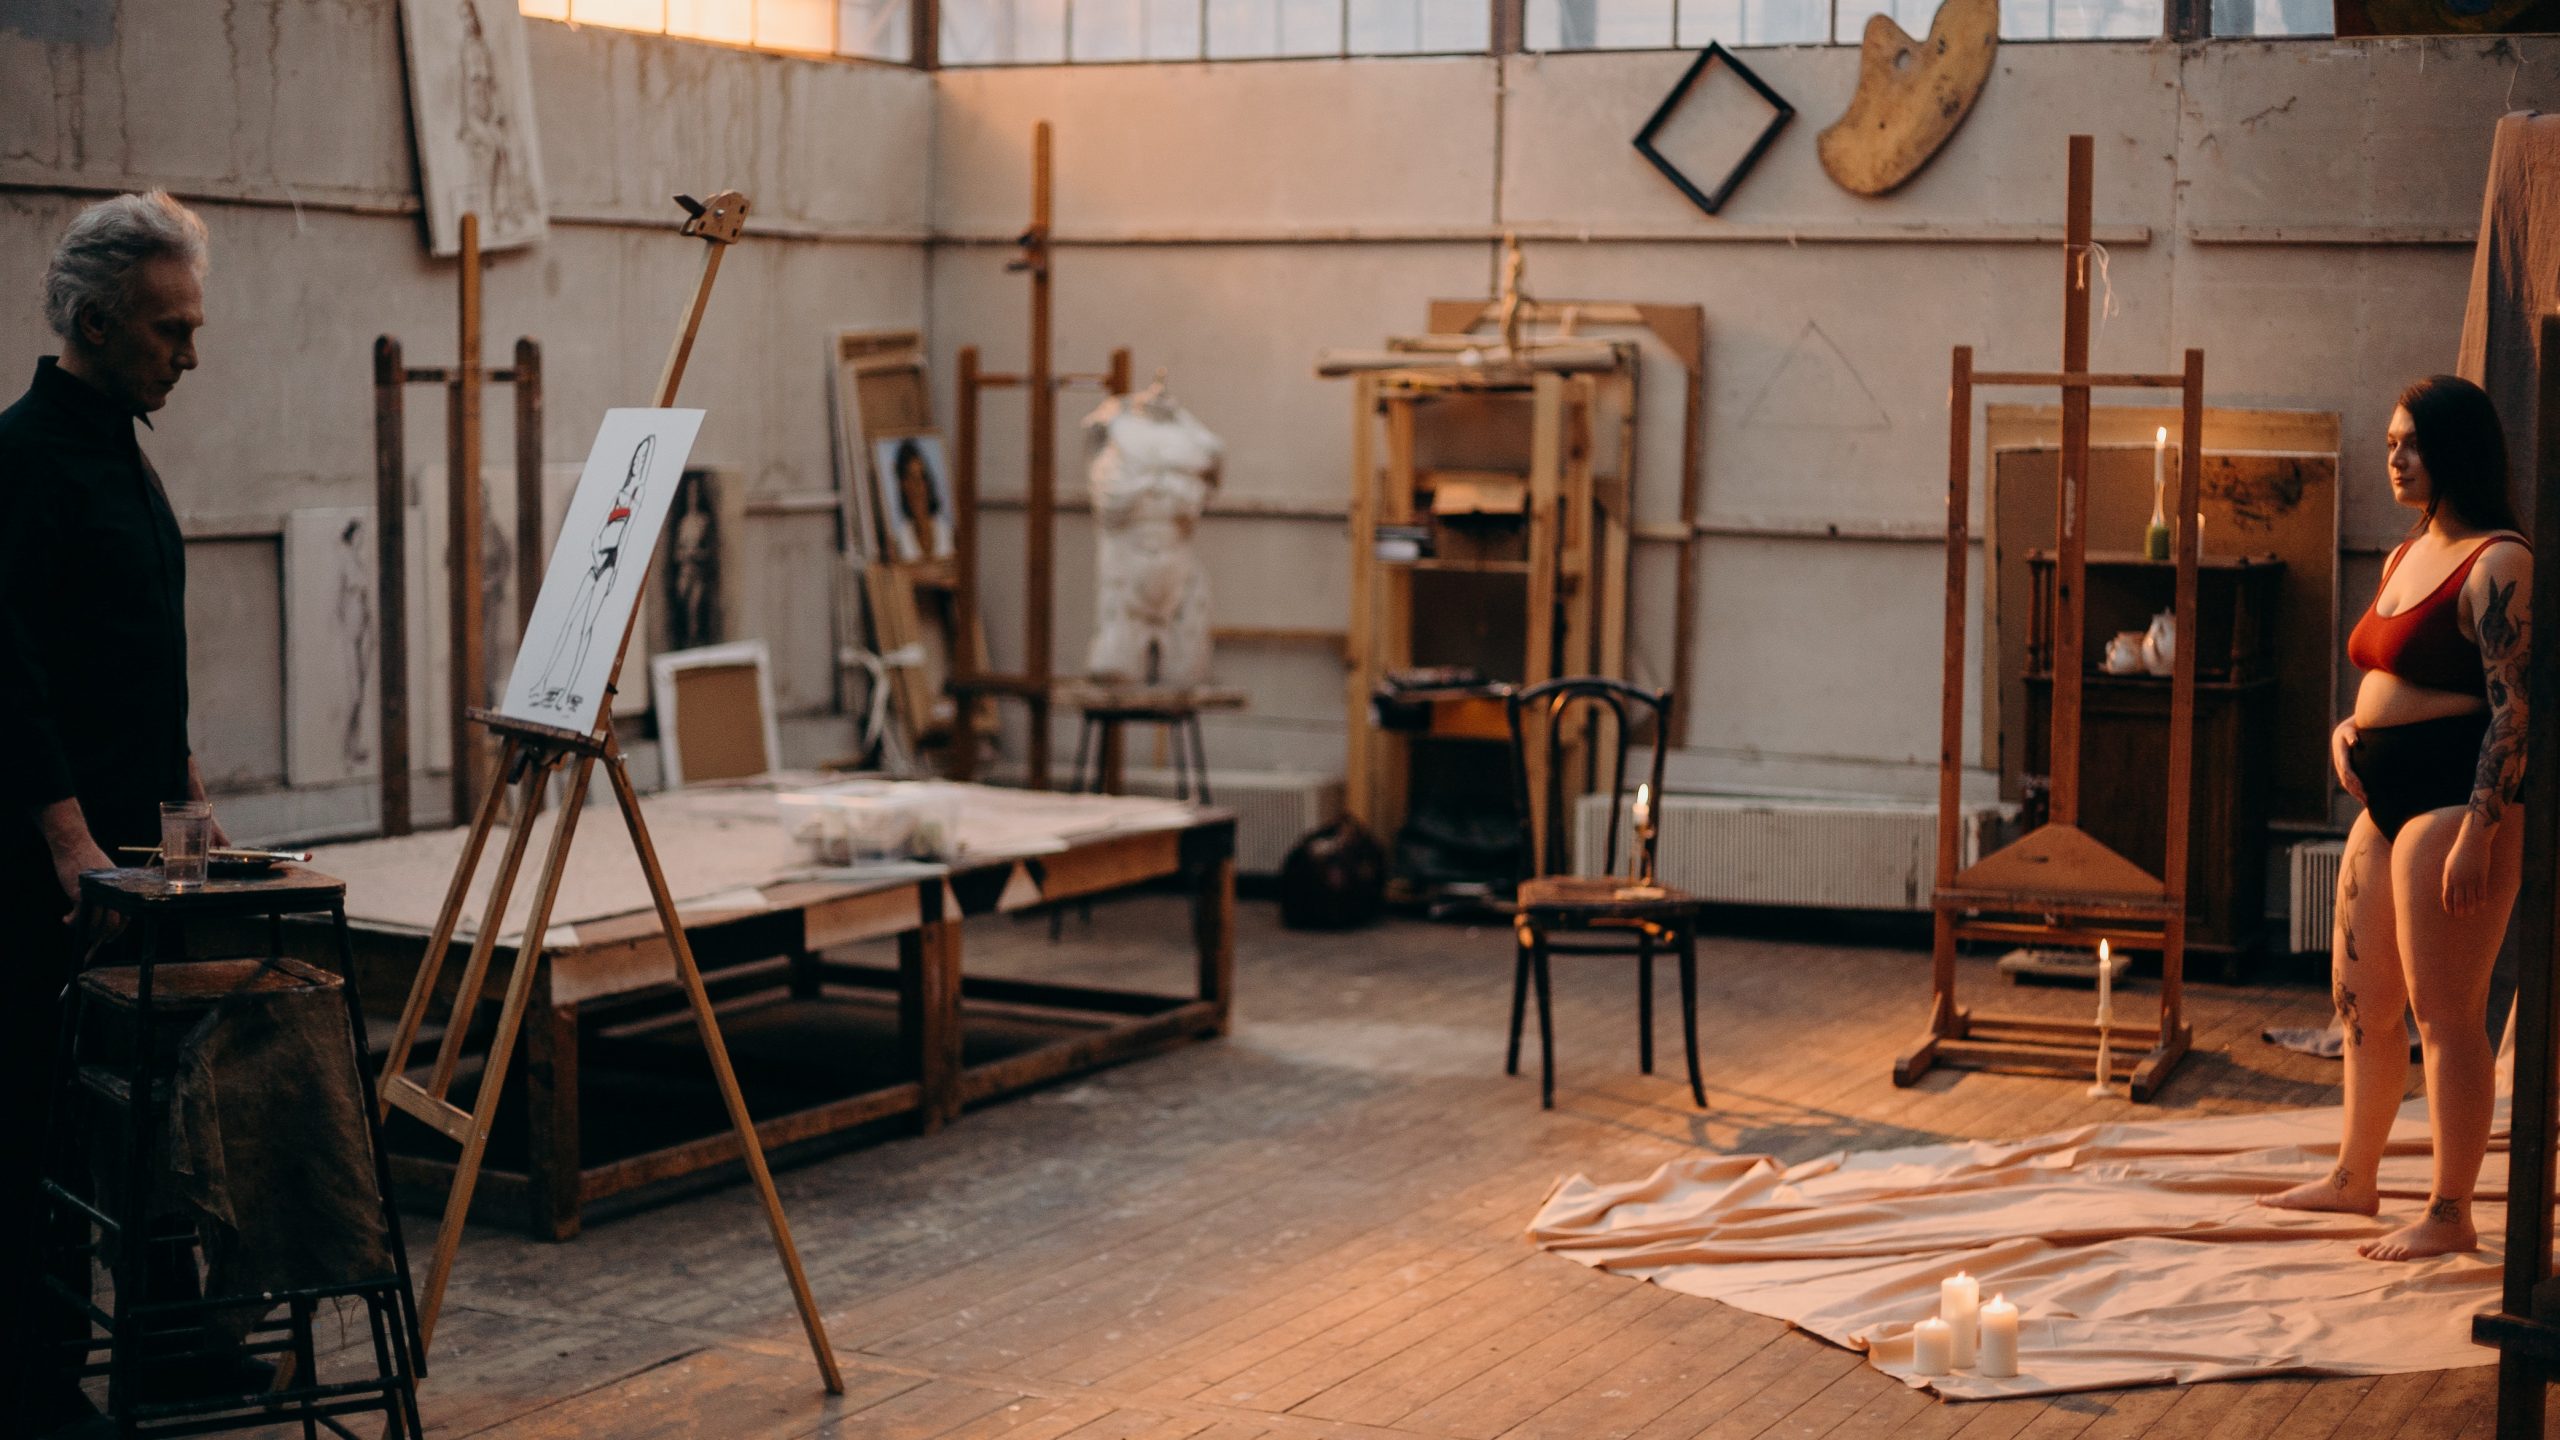
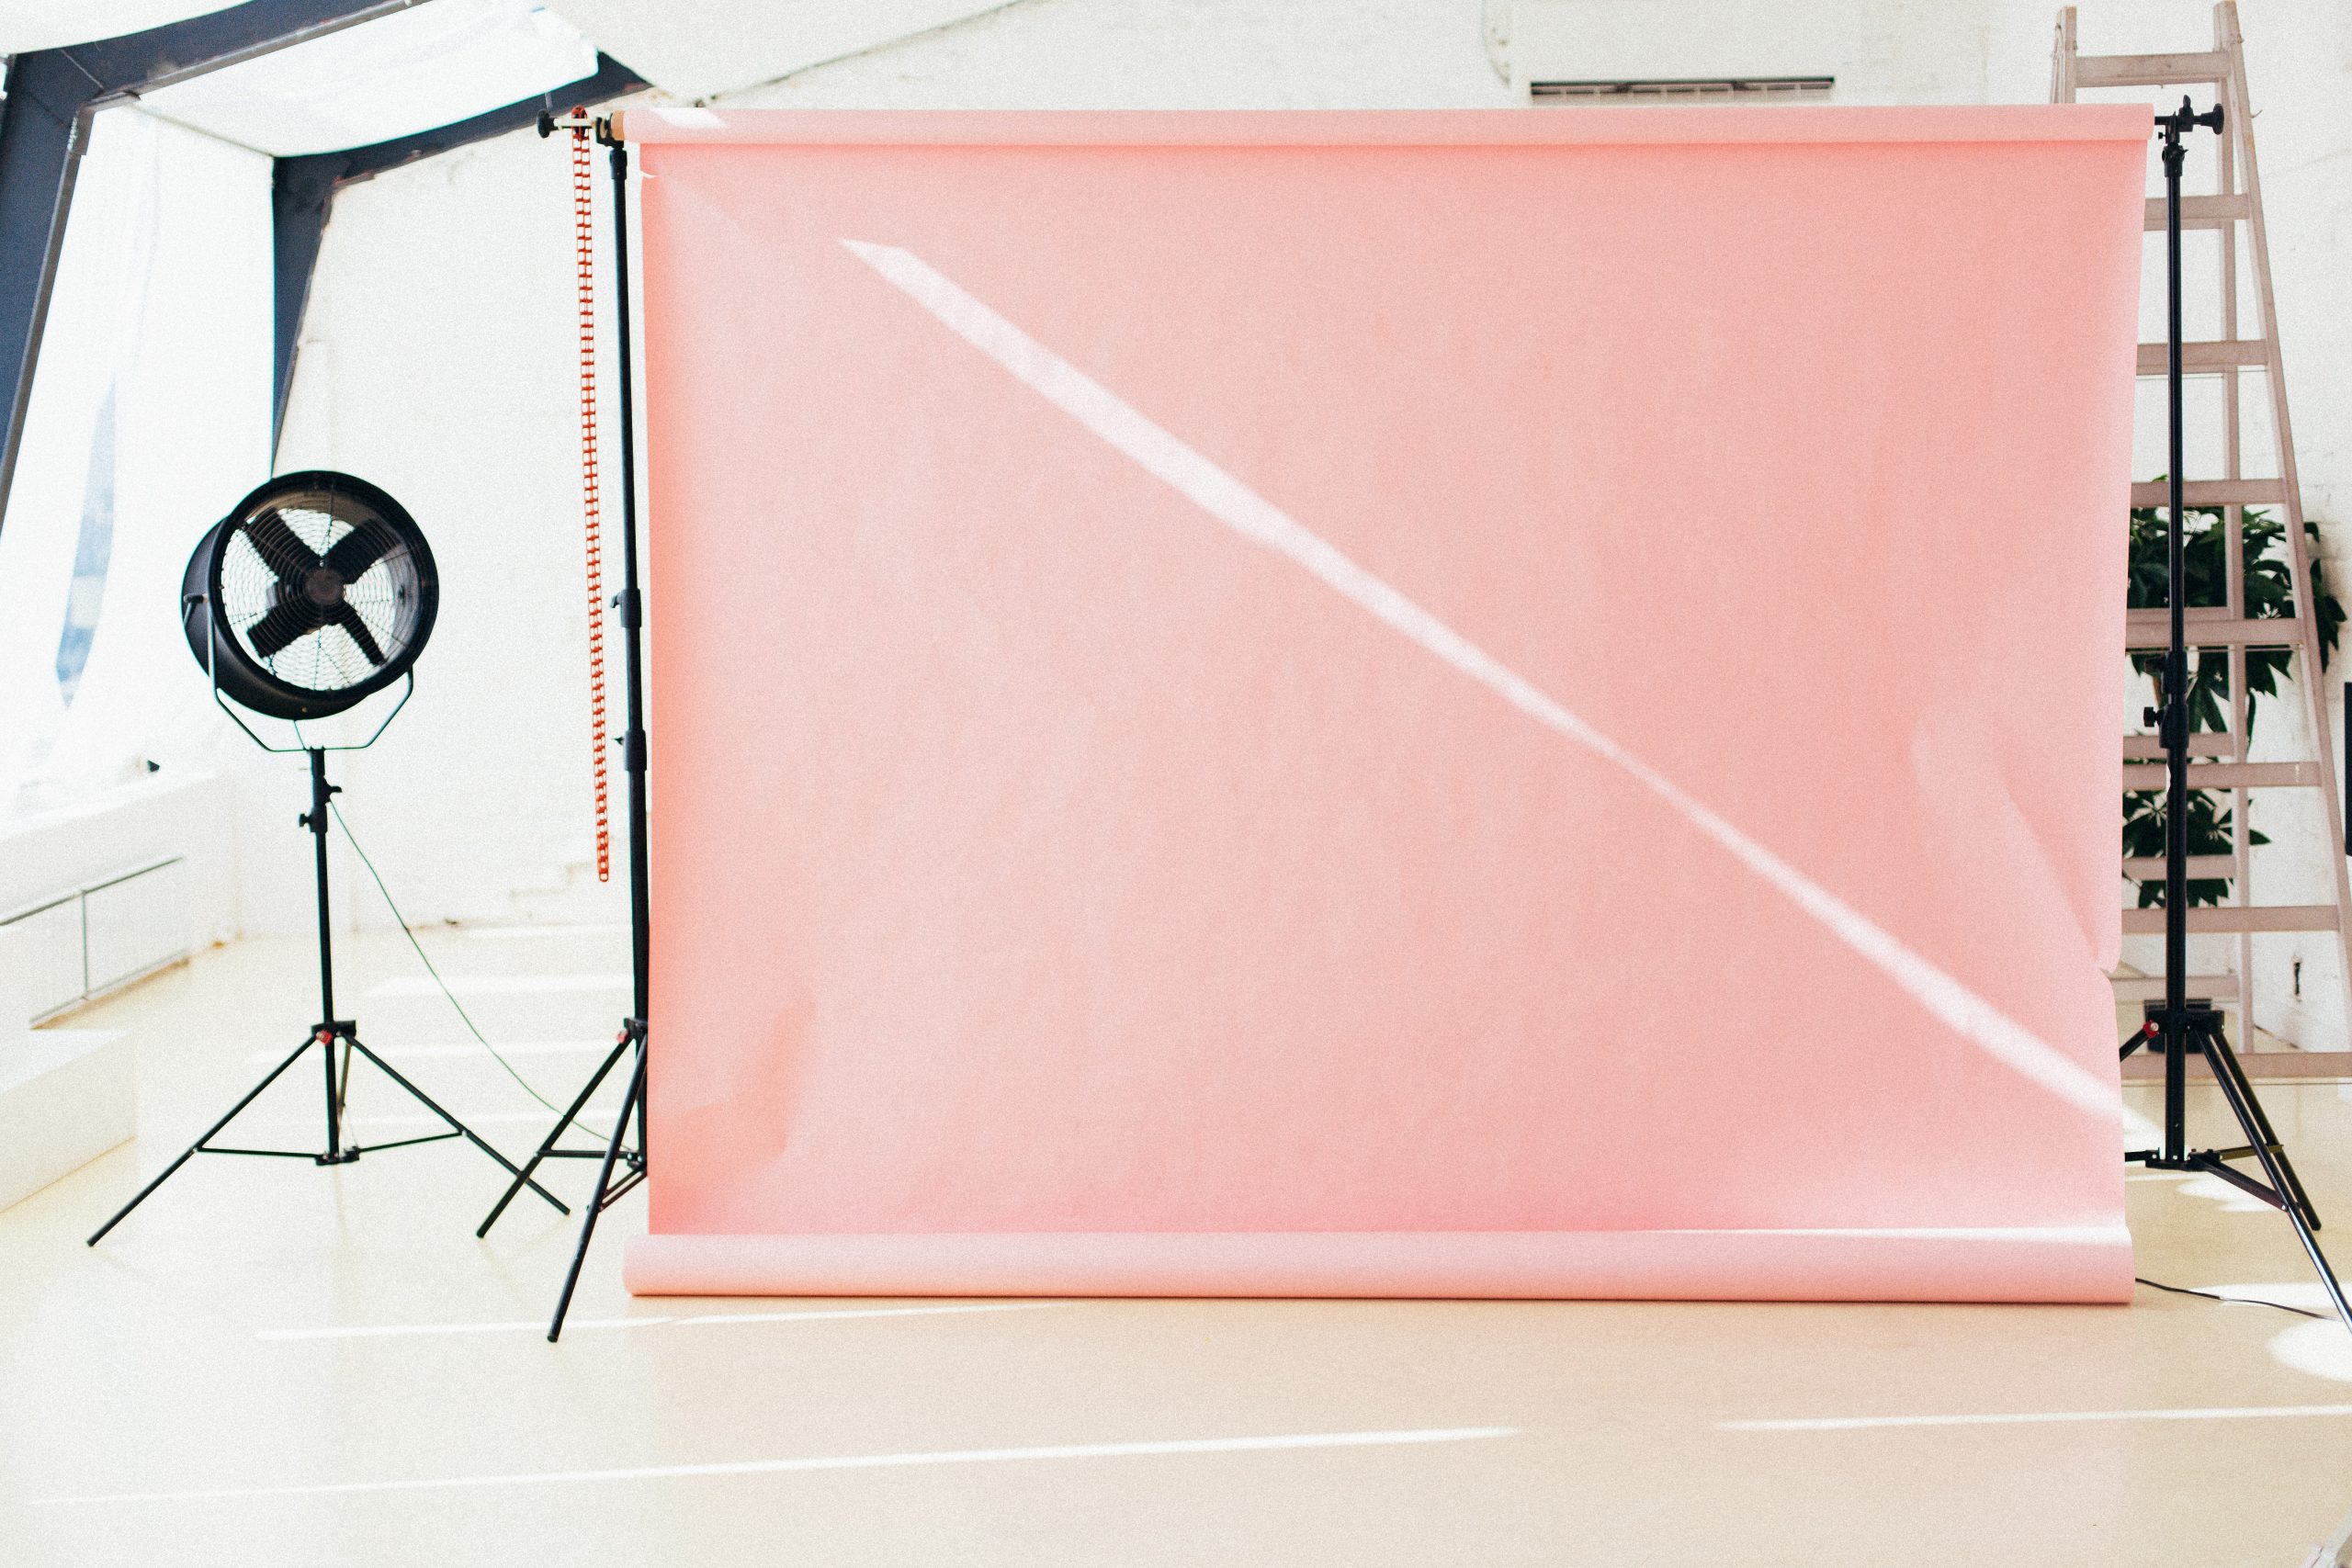
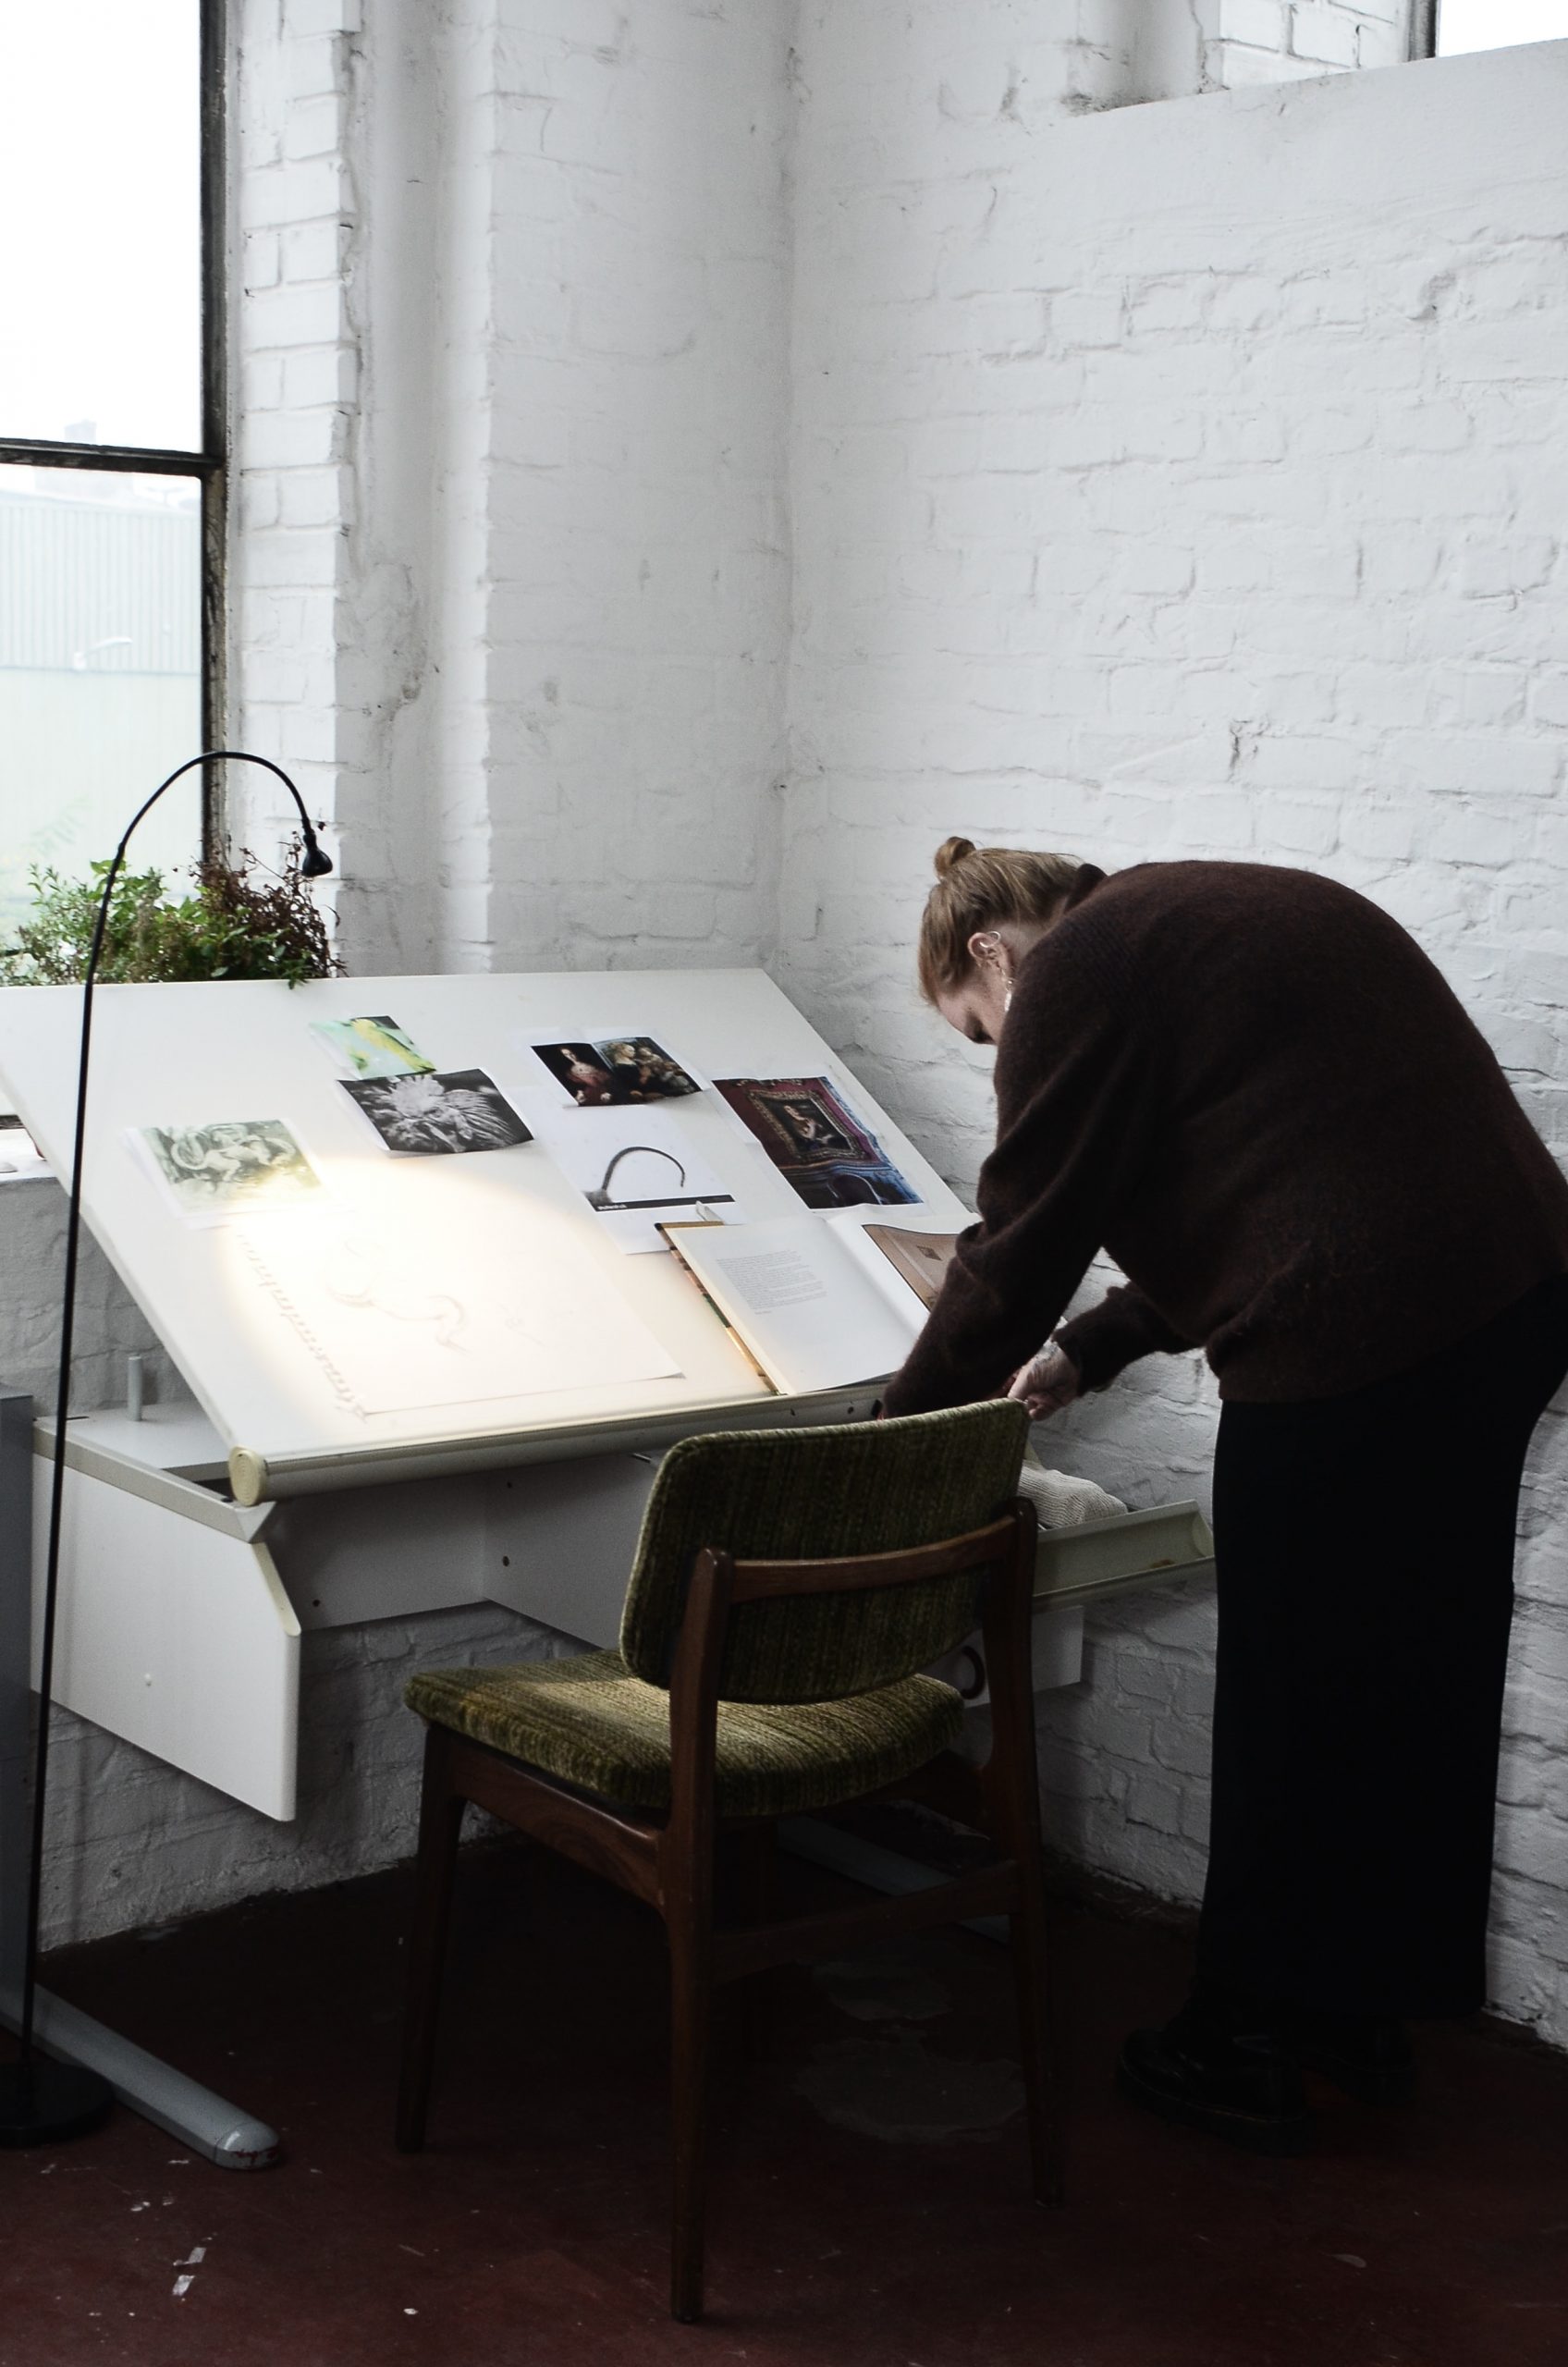
Take the following studio photos as an example to analyze (ignoring creative confusion). As you can see, there is a medium-sized window, shutters on the left side of the drawing board, and overhead lamps. There is a soft box there, but it is only used for shooting. All I need to do to repair the indoor lighting is to replace the overhead light with a strong, color-balanced, more powerful LED tube, and change the position of the easel relative to the light. No need to go out and buy all new equipment.
Angle of light
The angle of light associated with painting is the first thing we have to consider. Ideally, the main light source will be behind you at an angle of 45 degrees to the painting. This will help:
***Spread the light evenly on your painting. You don’t want one half to be clearly illuminated and the other half to be illuminated. This will be an arduous effort.
***Make sure there is enough light on the painting.
***Avoid any glare on your paintings (only the light is reflected to you). The following are examples of glare you want to avoid while painting.
You should also make sure that the light source is within a reasonable distance-not too far away, because there will not be enough light to shine on the painting, and not too close because the light will be uneven on the painting.
Tip: If ou cannot move the light source, move the easel. If needed, you can even tilt the easel down.
brightness
The intensity of light is mainly determined by two things:
The actual intensity of the light source
The distance between the light source and the painting. The greater the distance from the painting, the weaker the light will be.
It is important that you must consider both factors at the same time. Strong light sources that are too far still appear faint in painting.
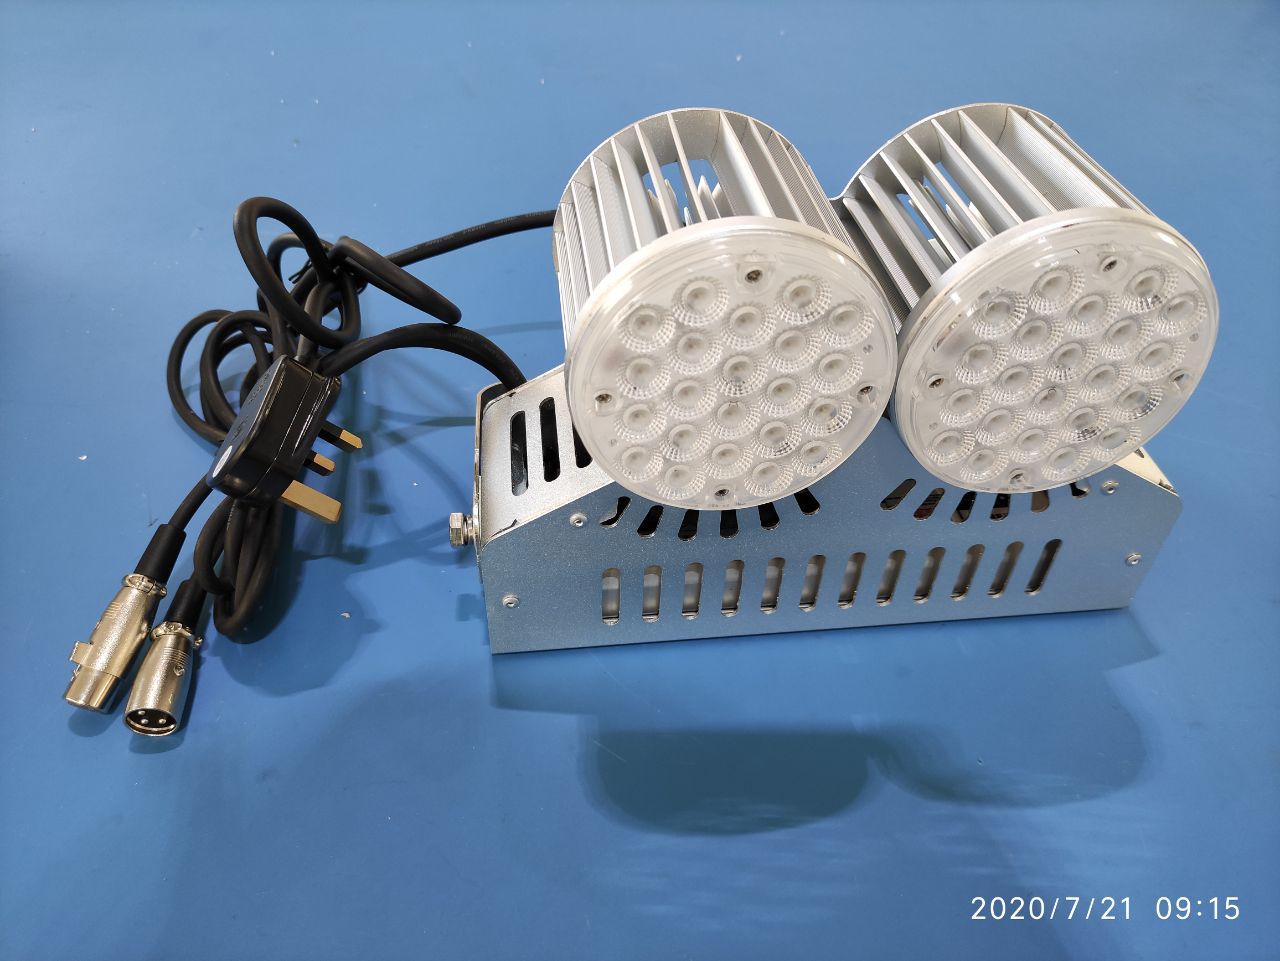
When buying a lamp, you need to look for five things. The type of light source, watts, lumens, color temperature and color rendering index.
Here are some different types of lights:
Incandescent lamp
halogen
led
Fluorescent lamp
Compact fluorescent lamp (CFL)
Watt is a measure of how much power a light source uses, not a measure of the brightness of the light source. However, lumens is a measure of how much light is actually produced. Therefore, when comparing the intensity of two different types of bulbs, you should use lumens instead of watts. Watt is useful for comparing bulbs of the same type.
We will not compare all different types of light bulbs, because many other light bulbs have done it, and the answer always seems to be the same. I recommend that you stick to higher power LEDs, fluorescent lights or CFL bulbs. The actual wattage and the number of lights required will vary according to the distance between the lights and the painting. Just make a judgment and make adjustments as needed.
The color temperature and color rendering index are discussed below.
Light temperature
Not all lights are the same. Different light sources have different temperatures. Compared with the cold light of a cloudy day, your colors will look different in the warm light of the sunset.
The color temperature is measured by the Kelvin scale, as shown in the figure below:
Here are some important reference points for natural light:
Clear blue sky: cool temperature (blue and white).
Sun at noon: approximately neutral (white)
Moonlight: slightly warmer (yellow)
Sunset: very warm temperature (orange)
The color temperature of artificial light is also different. You can use very warm (orange) artificial light or very cool (blue) artificial light.
The color temperature of the bulb is usually indicated on the box by the manufacturer.
In my studio, I use high-quality 5,000K LED lights. Before that, I used 4000K LED lights (with a slightly warm light). As a result, my paintings are always too cool, dominated by blue. This is because I cannot see blue correctly under warm light, so using too much blue will overcompensate. When I took the painting out of the studio, the light became more neutral and the advantages of blue gradually became apparent. The following is one of the paintings, which turned out very well, but as you can see, I certainly prefer the blue tree:
we recommend choosing a color temperature of 5,000K to 6,000K, which is a fairly balanced color temperature. Anything outside this range may be too orange or too blue.
Color rendering index (CRI)
CRI is basically the quality level at which a light source can faithfully display colors. The CRI level for natural lighting is 100. As artists, our goal is to replicate natural light in the studio.
When buying a lamp, you should look for a CRI rating of over 80 (the higher the better).
In an ideal world, all of us would have large windows facing north to allow plenty of natural light to enter our studio. But in fact, most of us need to rely more on artificial lighting. In fact, even if you do have a large window facing north, you still want artificial lighting at night.
Artificial light has many benefits:
***This is consistent. You don’t have to worry about the changing nature of natural light.
***It allows you to paint at any time (including night).
***You can customize it to meet your needs. If you want to paint under warm light, you can set warm light. If you want to paint under cold light, you can set cold light.
In a perfect world, I will have both-a large window facing north and many high-quality artificial lights that can be painted at night
The lighting of Art studio doesn’t have to be that complicated. After all, it’s important that you:
Right angle of the lamp
Good enough light (reasonably high lumens and 80+ CRI)
Balanced color temperature
The simplest solution is to just grab a few LED bulbs of about 5500K and fix them at a 45-degree angle to the painting.
4 tips for studio lighting layout
If you are going to be a new studio, you must know that finding a good lighting arrangement is not easy. It is more complicated than fixing two flash lights at a 45 degree angle. If you are an experienced studio owner, you are always looking for new technologies and different lighting settings. You must constantly try new things.
So today, we have listed four different lighting layout technologies. They are relatively uncommon, at least for beginner painting artists. If you are an experienced studio painting artist, I bet you will learn new things here. Either way, they are very simple and easy to implement, so you can try them today.
★Use light source as background
Check this out: Take a large soft box and put it behind your subject. Make sure you can take a head and shoulders portrait and only have soft boxes in the background. Set to full power transmission. Now take two large white bounce cards, about the size of a soft box, and place them at a 45-degree angle to the model so that they can reflect light back. The trick is to stay as close to the model as possible. This setup should be a three-sided box, they are difficult to get in and out. This is because we try to keep all the light, and we don’t want any light to escape. Leave a small space between the two cards to observe the model. Ok. Therefore, there is a soft box with a full-power flash on the back of your model. You have two reflective cards that reflect light. How does this look?
The reason we have full power strobes is that we want as much light to reflect back as possible. In any case, the background is white, so turning up the power will not affect this. But it does give us a better understanding of the model’s face. You can see some smudges of light coming from behind on the edges of her hair. This is the only disadvantage of this setup. But in this case, it looks pretty cool.
★Use gel on the background light
Okay, so you may have used the backlight before. If you haven’t already, the idea is simple: just point the main light at the background to make it brighter. Now you can do many things with the lights on the background, but I will give you a simple try: use gel on your background board.
The gel is great. For us artists, they are a crazy value because they are very cheap and we can do many cool things with them. The gel is just a piece of transparent colored plastic, you can put it on the light to change its color. If you don’t have one, you should buy a set and try it.
Anyway, what happens when we use gel on the background plate, it’s just a gray background with a basic flash, which is transformed from $2 plastic, it’s cool, right?
★Rim Light your theme
Looking for some extra pop music to make your theme truly stand out? Here, let’s try edge lighting.
If you are used to making a basic dual-light 45 degree setting for your portrait, you will like this. First, you do this with a basic dual-light 45 degree setting. Just set it as usual. Then you have to add two lights on both sides of the main body, each of which has a strip-shaped soft box.
Don’t have four lights? Use reflective bounce cards instead of two main lights. Reflect the light in the bar box back to the painting object to fill the shadow. If you pull it correctly, the edge lighting can look very dramatic.
★Avoid light overflow by feathering the light
As a painter, there are many times in the studio where we want a very bright background. If you live in a studio like me, you know what I’m talking about. However, if we try to illuminate the model at a 45 degree angle, some light will always overflow into the background. The background eventually looks gray instead of black. This simple technique allows you to light up your subject almost the same while greatly reducing light overflow.
First, move the light closer to the painting object, and then move it a bit to the sides. Then turn the light inward so that only the edges of the light can reach the model, and most of the light will shine in front of them. In front of the model, the lights should almost point towards each other.
If you are using a soft box, you only need to turn the edge of the soft box toward the model. In fact, you only allow the edges of the light to reach the model. The rest are in front. You may need to adjust your exposure a bit, because we may lose a little light here.
But now looking at the background, all the light is gone. Since we point the light forward, no light can splash on the background. Only excellent edges can reach the model.