LED lamps are energy-saving, high-brightness, long-life, and low-failure rate. They have become the favorite luminous body of ordinary household users. However, a low failure rate does not mean that there is no failure. What should we do when the LED lamp fails-replace the lamp? Too extravagant! In fact, the cost of repairing LED lights is very low, the technical difficulty is not high, and ordinary people can operate it.
The broken of LED beads
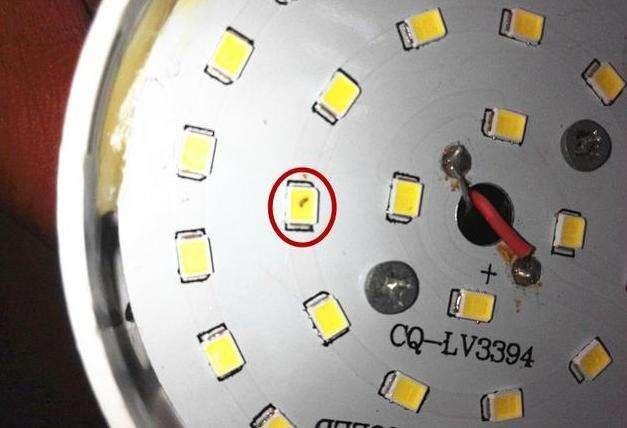
After the LED lamp is turned on, some of the lamp beads do not light up, basically it can be judged that the lamp beads are damaged. The damaged lamp bead can generally be seen with the naked eye-there is a black spot on the surface of the lamp bead, which proves that it has been burned. Sometimes the lamp beads are connected in series and then in parallel, so the loss of a certain lamp bead will cause a lamp bead to not light up.
We provide two maintenance solutions based on the number of damaged lamp beads.
Minor damage
If only one or two lamp beads are broken, we can repair them by these two methods:
Find the broken lamp bead, connect the metal at both ends of it with a wire, and short-circuit it. The effect of this is that most of the lamp beads can light up normally, and only the broken individual lamp beads do not light up, which has little effect on the overall brightness.
If you have strong hands-on ability, you can go online to buy the same model of lamp beads (a large bag of ten dollars), and replace it yourself-use an electric soldering iron (a hair dryer to blow on for a while) to heat the old lamp beads , Until the glue on the back of the old lamp bead has melted, remove the old lamp bead with tweezers (don’t use your hands, it is too hot). At the same time, install the new lamp beads while it is hot (pay attention to the positive and negative poles), and you’re done!Massive damage
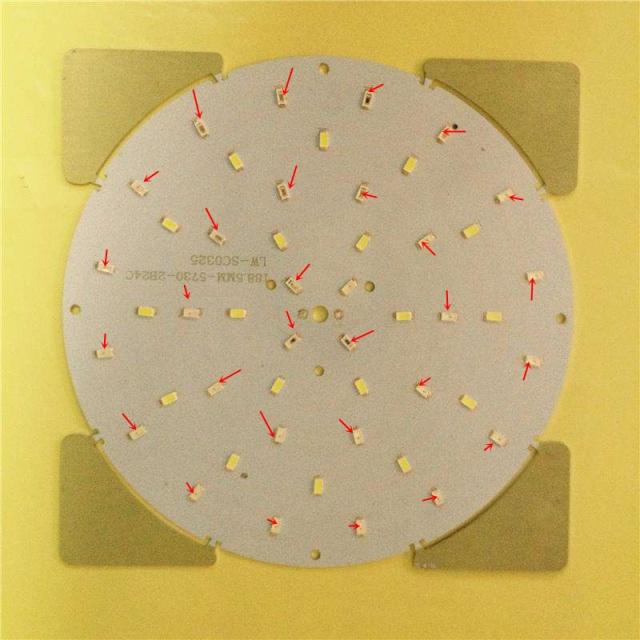
If a large number of lamp beads are damaged, it is recommended to replace the entire lamp bead board. The lamp bead board is also available online. Pay attention to three points when buying: 1. Measure the size of your own lamp, 2. Look at the appearance of the lamp bead board and the starter connector, and 3. Make a note of the output power range of the starter.
These three points of the new lamp bead board must be the same as the old lamp bead board-replacement of the lamp bead board is very simple, the old lamp bead board is fixed on the lamp holder with screws, and it can be removed directly. The new lamp bead board is fixed with magnets. When replacing it, remove the new lamp bead board and connect it to the connector of the starter.
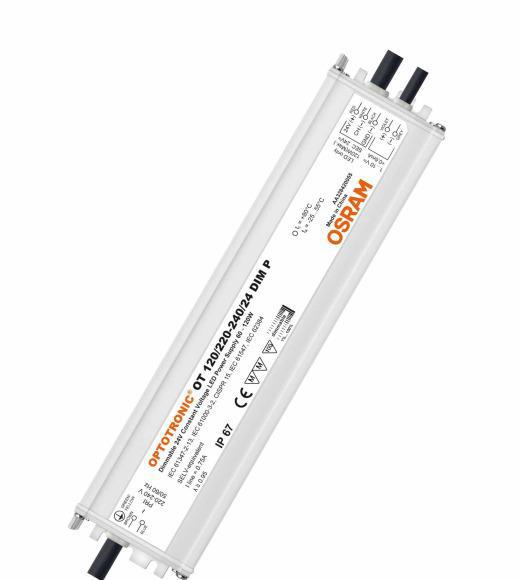
The starter is damaged
Most of the LED lamp failures are caused by the starter-if the lamp does not turn on at all, or the lamp flickers after it is turned on, the starter is probably broken.
The starter cannot be repaired, so it can only be replaced with a new one. Fortunately, the new starter is not expensive. Pay attention to three points when buying a new launcher:
Pay attention to the appearance of the connector,
Make a note of whether your lamp can change color and several colors. The number of discolorations of the new starter must be the same as the old starter,
Make a note of the output power range of the starter-a range will be marked on the starter, as long as the power of the lamp bead board is within this range.
The replacement is still very simple, first separate the starter from the lamp bead plate, the starter is also fixed on the base with screws, and you can remove it. The new starter is also a magnet, so it can be sucked and connected to the lamp bead board.
Reasons for LED light Strobing:
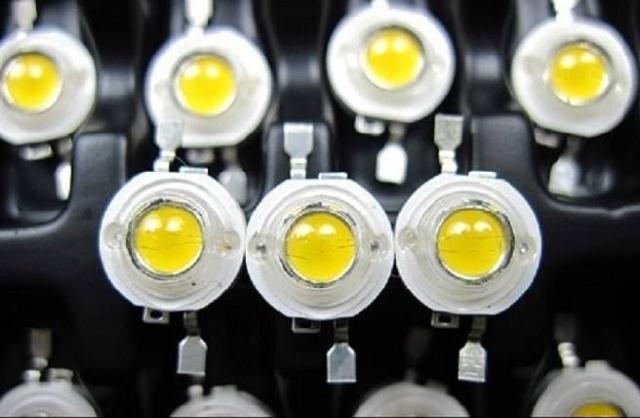
The LED lamp bead does not match the LED drive power supply. Normally, a single 1W lamp bead can withstand current: 280-300mA, voltage: 3.0-3.4V. If the lamp bead chip is not of sufficient power, it will cause the light source to flicker. If the current is too high, the lamp beads will turn on and off if they can’t bear it. Serious phenomena will burn the gold or copper wires inside the lamp beads, causing the lamp beads to not light up.
It may be that the driving power supply is broken, as long as it is replaced with another good driving power supply, it will not flash.
If the driver has an over-temperature protection function, and the material heat dissipation performance of the lamp cannot meet the requirements, the over-temperature protection of the driver will flash and flicker when it starts to work, for example: 20W floodlight housing is used to assemble 30W lamps, This will happen if the heat dissipation work is not done well.
If the outdoor lamps also flicker on and off, then the lamps are flooded. The consequence is that it will not light up when it flashes. The lamp beads and driver are broken. If the driver is waterproof, just break the lamp beads and replace the light source.
How to deal with LED Flicker:
In offline low-power LED lighting applications, a common power supply topology is an isolated flyback topology. To meet the “Energy Star” solid-state lighting standard 8W offline LED driver GreenPoint.
Take the reference design as an example. Since the sine-square-wave power conversion of the flyback regulator does not provide constant energy to the primary bias, the dynamic self-powered (DSS) circuit may activate and cause light flicker.
In order to avoid this problem, the primary bias must be partially discharged in each half cycle. Accordingly, the capacitance and resistance of the bias circuit must be appropriately selected.
Normally, the human eye can perceive light flicker with a frequency up to 70 Hz, but it will not perceive it above this frequency. Therefore, in LED lighting applications, if the pulse signal has a low frequency component with a frequency lower than 70 Hz, the human eye will feel flicker. Of course, in specific applications, there are many factors that may cause the LED lights to flicker.
Even in LED driver applications that provide good power factor correction and support TRIAC dimming, electromagnetic interference (EMI) filters are required. The transient current caused by the TRIAC step will excite the natural resonance of the inductor and capacitor in the EMI filter.
If this resonance characteristic causes the input current to drop below the TRIAC holding current, the TRIAC will be turned off. After a short delay, the TRIAC will usually turn on again, exciting the same resonance. In one half cycle of the input power waveform, this series of events may be repeated many times, resulting in visible LED flicker.
Other reasons and solutions for LED flicker:
Normally, the human eye can perceive light flicker with a frequency up to 70 Hz, and will not perceive it above this frequency.
Therefore, in LED lighting applications, if the pulse signal has a low frequency component with a frequency lower than 70 Hz, the human eye will feel flicker. Of course, in specific applications, there are many factors that may cause the LED lights to flicker.
For example, in offline low-power LED lighting applications, a common power supply topology is an isolated flyback topology.
Take the 8W offline LED driver GreenPoint® reference design that meets the “Energy Star” solid-state lighting standard as an example. Because the sine square wave power conversion of the flyback regulator does not provide constant energy for the primary bias, dynamic self-powered (DSS) ) The circuit may activate and cause light flicker.
In order to avoid this problem, the primary bias must be partially discharged in each half cycle. Accordingly, the capacitance and resistance of the bias circuit must be appropriately selected.
In addition, even in LED driver applications that provide excellent power factor correction and support TRIAC dimming, electromagnetic interference (EMI) filters are required.
The transient current caused by the TRIAC step will excite the natural resonance of the inductor and capacitor in the EMI filter. If this resonance characteristic causes the input current to drop below the TRIAC holding current, the TRIAC will be turned off.
After a short delay, the TRIAC will usually turn on again, exciting the same resonance. In one half cycle of the input power waveform, this series of events may be repeated many times, resulting in visible LED flicker.
In order to deal with this problem, a key requirement of TRIAC dimming is that the input capacitance of the EMI filter is extremely low, and this capacitance must be able to be decoupled by the TRIAC and the winding impedance. According to the formula, if the capacitance in the dimming module is reduced, the resistance of the resonant circuit can be increased, in principle, the oscillation can be suppressed and the desired circuit operation can be restored.
Flicker caused by pulse signal frequency
The pulse signal has low frequency components with a frequency lower than 70 Hz, and the human eye will feel flicker.
Processing steps:
First of all, we must make sure that there is no problem with the circuit where the LED lights of our own family are located. The main problem will lie in the switch, which is the focus of our inspection.
Check the power converter on the back of the LED light. Disassemble the converter directly, then power on and measure the voltage or current with a multimeter. If the power converter is damaged, you can buy and replace it directly. This is generally very cheap.
If there is no problem with the power converter of the LED lamp, then we can switch the multimeter to the voltage output position, and then put it on the positive and negative poles of the corresponding LED lamp beads to see if it will light up. If it doesn’t light up, just replace it.
Generally, 90% of the LED lamp problems can be solved after the above three steps, so that our LED lamps can regain their due brilliance.

 Massive damage