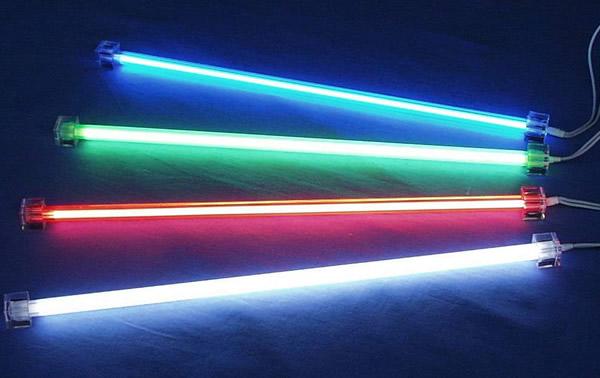
LED color changing light is a new type of light bulb. Its shape is the same as a general milky white incandescent bulb, but it will automatically change color at certain time intervals after lighting. Cyclically emits cyan, yellow, green, purple, blue, red, and white light. It is suitable for family birthday parties, holiday parties, festivals and New Years, adding a happy atmosphere to the festival. It can also be used in entertainment venues and as advertising lights. The color changing light bulb is characterized by energy saving (power consumption of about 1W), long life, convenient use and low price.
Why does the color change automatically? What circuit is used to achieve the color change? Take the LED color changing light bulb apart and take a look, and sort out the circuit diagram from the components and wiring on the circuit board. The circuit is understood and analyzed. It is found that the circuit design is clever and unique.
The Optical Principle of Color Change
The color changing light is composed of three primary color LEDs: red (R), green (G), and blue (B). Bi-color LEDs are very familiar to us. Generally, it consists of red LED and green LED. It can emit red or green light alone. If red light and green light are bright at the same time, the red and green light will be mixed into orange-yellow.
When the three primary color LEDs light up two LEDs respectively, it can emit yellow, purple, and cyan (such as red and blue LEDs emit purple light when they are lit). If the red, green and blue LEDs are lit at the same time, it will produce white light.
If there is a circuit that can make the red, green, and blue LEDs light up in pairs, individually, and the three primary color LEDs at the same time, seven different colors of light can be emitted.
Structure of color changing lamp
The structure of the LED color changing lamp is composed of a capacitor step-down stabilized power supply, an LED controller and an array of G, R, and B three primary color LEDs. Since these three parts must be installed in the lamp holder, the power supply adopts a simple circuit of capacitor step-down, full-wave rectification and Zener diode voltage regulation.
The power supply outputs 15V for the LED array, and outputs 14.6V for the LED controller. When one of the output terminals (1, 2, 3) of the controller is at a low level, the green LED is on. If the three output terminals are all low level, white light will be emitted (green, red and blue LEDs are all on).
The LED controller is the key to the color changing light, which is undertaken by the CD4060. Let me introduce the CD4060 first.
Introduction to CD4060
The CD4060 is one of the 4000 series CMOS devices and is a 14-bit binary counter. It has two inverters inside, and two external resistors and one capacitor can form an oscillator as a clock generator. When a clock pulse is input (falling edge), the output terminal outputs a count pulse. It has a reset terminal. When the reset terminal is high, all outputs are low.
The CD4060 is available in a 16-pin DIP package. Where Clock in is the clock pulse input. Clock out 1 and Clockout 2 are clock pulse outputs (phase difference 180°), and Reset is a reset input (active high). Q4~Q14 are binary counting pulse output terminals, Vdd is the positive terminal of the power supply (3~18V), and Vss is the negative terminal of the power supply.
The Circuit of LED color Changing Light
The circuit of the LED color changing lamp is composed of a power supply part, a color changing control part and an array of three primary color LEDs. Here are the working principles:
1. Power section
The capacitor step-down circuit composed of step-down capacitor C1, full-wave rectifier D1-D4 and Zener diode D5 is a typical AC/DC conversion circuit. After being regulated by a 15V Zener diode (strictly speaking, it is limited), it is used as the power supply for driving the LED array.
The voltage (about 14.5V) filtered by D6 and C2 is used for CD4060 and the reset voltage (high level). The resistor R1 connected in parallel with the capacitor C1 is that after the power supply is disconnected, the charge on C1 is discharged through R1 to prevent the lamp cap from being charged.
The characteristic of this power supply is that when the load voltage is less than 220V, the load current IL≈69C. Among them, C is the step-down capacitor, the unit is uF, and the unit of IL is mA. For example, when C=0.47 uF, the current flowing through the load is about 32.4mA, and this current is relatively stable. In addition, this power supply is small in size (small footprint). The disadvantage is that it is not isolated from the mains, it is required to be enclosed in the lamp holder, and it is required to have good insulation.
2. discoloration control section
The discoloration control part is undertaken by the binary counter CD4060. The clock pulse signal does not use a general oscillator circuit (there are two inverters inside the CD4060, and two external resistors and one capacitor can form an oscillator), but R5 is connected in series in the power supply circuit. The 50Hz AC voltage on R5 forms a sharp pulse as a clock pulse signal through the differential circuit composed of R3 and C3.
In the output counting pulse, select the three terminals of Q8, Q9 and Q10 to be connected to the negative pole of the LED. When the counting pulse outputs a low level, the corresponding LED string is lit. The period of 50Hz is 0.02s, the period of Q8 is 5.12s, the period of Q9 is 10.24s, and the period of Q10 is 20.48s.
Color changing mechanism of LED lights
Q8 is connected to the negative electrode of the red LED string, Q9 is connected to the negative electrode of the blue LED string, and Q10 is connected to the negative electrode of the green LED string. Then when Q8 is at high level and Q9 and Q10 are at low level, the blue and green LEDs are strung on, and cyan light is emitted after color mixing. Because Q9 and Q10 are low level, the Reset terminal is low level. After 2.56s, it becomes bright R and G, and emits yellow light.
From Q8 to the 4th cycle, the outputs of Q8, Q9, and Q10 are all high, and the three strings of LEDs are all off. In order to avoid this situation in the process of discoloration, three diodes D7-D9 are added in the circuit, and R4 is connected to the reset terminal.
When the three terminals of Q8, Q9 and Q10 are all high level, a high level appears on pin 12 (Reset) at this time. The device is reset, causing each output of Q4-Q14 to be low. Once Q8, Q9, Q10 appear low level, the red, green and blue LEDs are all on, and the light turns into white light, that is, after the red light appears, when the red light ends, it immediately turns into white light. The Reset terminal immediately becomes a low level, skipping the 2.56s light-off condition. This is the cleverness of the circuit design.
3. Tri-color LED array
Each string of three primary color LEDs (B, R, G) consists of 4 LEDs connected in series. Since the tube voltage drop of the red and green LEDs is different from that of the blue LED and the luminous intensities of various light-emitting diodes are different, different current limiting resistors are set in the LED series connection loop. On the one hand, the current of the LED is forced, and on the other hand, the luminous brightness is better matched. The LED adopts a straw hat type with a large viewing angle and high brightness.
In the circuit, the step-down capacitor C1 adopts a withstand voltage of 250V, although the actual withstand voltage value of the 250V withstand voltage capacitor is greater than 300V, if the maximum value of the mains is 242V, its peak voltage is 341V. It is safer to use 400V withstand voltage.
Form and Circuit Board
The diameter of the milky white glass cover is Φ60 mm. The circuit board is divided into two parts, one is the power supply part and the controller part, and the other is the LED array.
The printed board of the power supply part and the controller part, the outer circle size is Φ38mm. The printed board of the LED array only shows the arrangement of LEDs of various colors and the wiring of the printed board. There are 4 connection lines between the two printed boards, and there are insulating pads between the two printed boards.
It should be pointed out here that the external bulbs must be opalescent. This will allow for better color mixing. Transparent materials are not allowed.
The power of this color-changing light bulb is about 1W, which is relatively power-saving, but the brightness is a little worse, and it is relatively novel and has a good effect.